How To Videos & Doc’s: How to Make a Bronica PG Mount Lens work with adapter.Updated 4 months ago
Here is how to Make the Aperture work on a Bronica PG Lens. See the 6 Steps Below;
1) Naturally, when the shutter is cocked, the aperture will not stay at the value you need without the depth of field preview button.
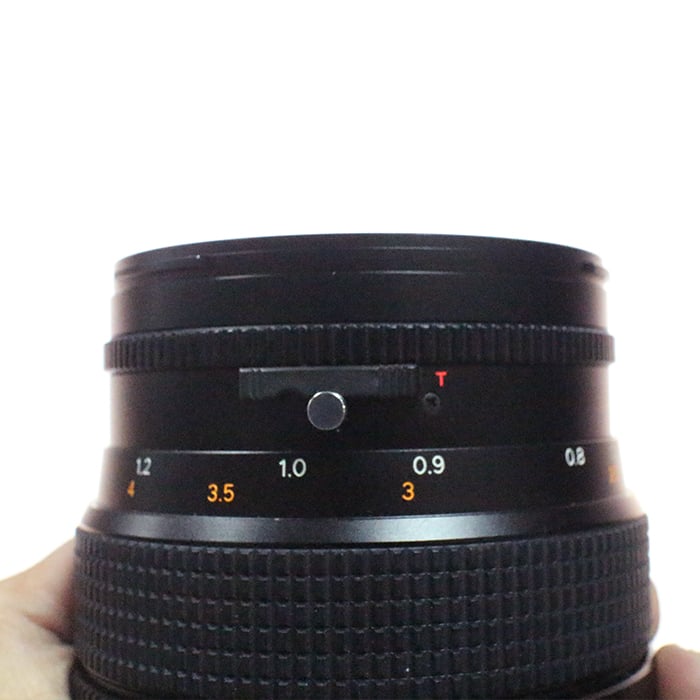
2) First, make sure that this tab is set to T, rather than A.
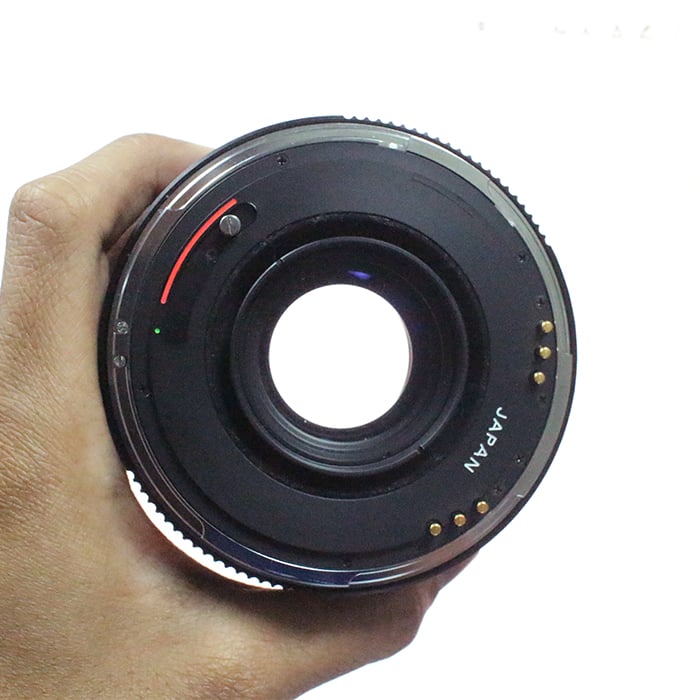
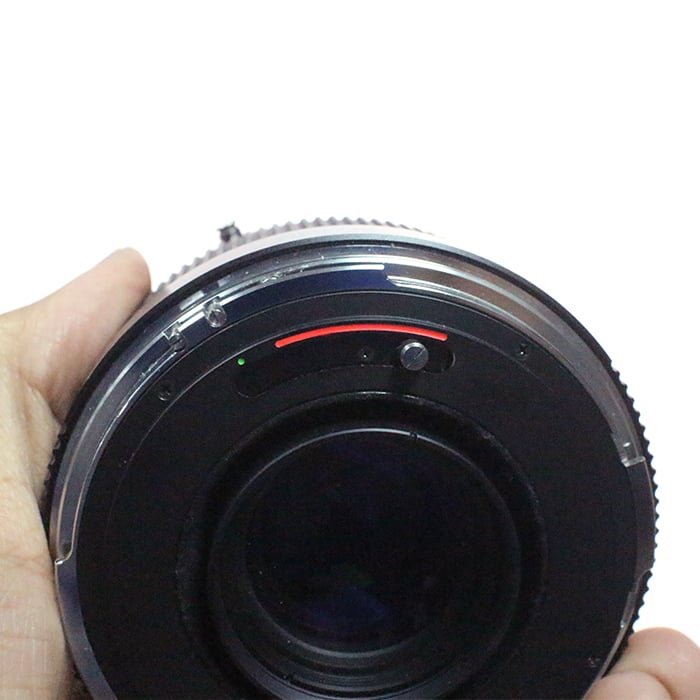
3) Look at the back of the lens, locating the shutter pin:
If this pin is on the right side and the aperture is adjusting without the depth of field preview button being held, aperture control should be enabled and no further instructions should be required
If this pin is on the right side and aperture is not adjusting as you turn the aperture ring, continue on to step 4.
If said pin is on the left side, go straight to step 5.
4) Move the pin counterclockwise from the right side, to the left side of the slot.
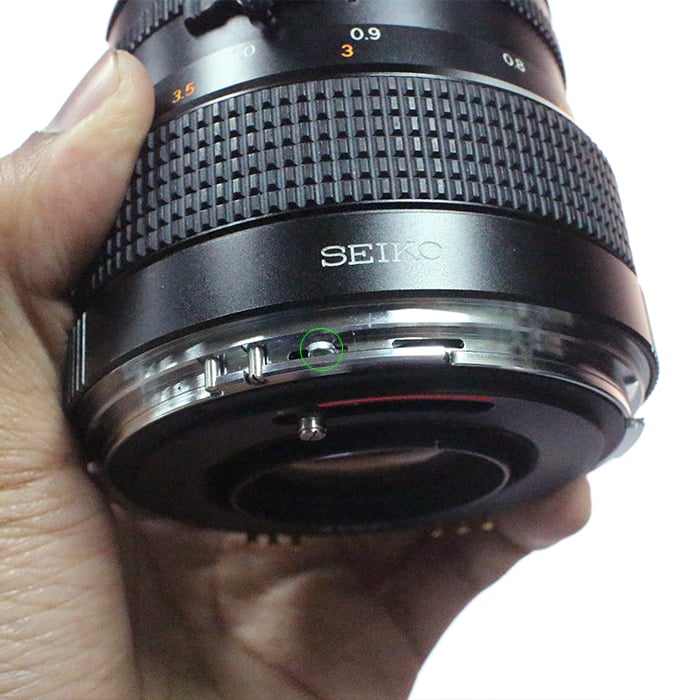
5) Now that the pin is on the left side of the slot, slide the tab (highlighted in green) to the left, and simultaneously move the pin clockwise from the left side of the slot to the right side.
6) Visible aperture control should be enabled. The depth of field preview button on the lens will need to be held down while shooting to have the aperture close down on the lens. Without holding that lever down, the lens will automatically revert to wide open by default. This is a property of the Bronica PG lens system and not something the Fotodiox adapter can overcome.