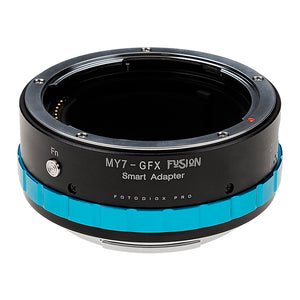
Auto Adapters: Mamiya 7 to GFX Fusion Adapter Manual & FirmwareUpdated a year ago
SKU: M7-GFX-FSN
UPC: 847372051649
ASIN:
MY7-GFX-Fusion-Manual update:
Mamiya7-GFX set the lens focal length process
1. Follow the aperture calibration procedure to calibrate the aperture value of the installed lens, and ensure that the aperture scale of the lens is consistent with the display on the body.
2. In the normal power-on state, press and hold the function button for 2S, the adapter ring enters the lens specification setting state (the camera display is the same as usual, and no change can be seen).
3. Rotate the aperture scale of the lens to the aperture value corresponding to the lens to be set, and press the shutter button to take a photo to confirm.
4. Shut down and restart, the adapter ring will transmit the focal length value of the set lens to the fuselage, and this information will be recorded in the EXIF information of the photo.
F5.6 43mm
F8 50mm
F11 65mm
F16 80mm
F22 150mm
F32 210mm
Adapter Firmware Updates
Fotodiox Pro Fusion Adapter, Smart Adapter – Compatible with Mamiya 7 Rangefinder Lenses to GFX Fusion-Mount Mirrorless Cameras with Limited Automated Functions
| v1.02.bin | 10/20/22 | Download Here | Added lens EXIF information input |
To Install:
1. Download and save the **.bin’ file from link above
2. Plug the adapter into your computer using a USB Micro to USB cable
• If adapter drive folder does not automatically open, find and open the adapter drive folder
3. Drag the **.bin’ file into the adapter drive folder
4. Wait for copy to finish, adapter folder window may close and reopen during this time
5. When finished, eject the adapter drive from computer and unplug
6. Your Fusion adapter is now ready for use, happy shooting!
ONCE UPDATED:
To calibrate the lens and set the aperture of your lens:
1. Set lens aperture to f/8
2. Hold the Fn while turning on the camera
3. Cock the adapter's blue shutter ring to open the lens' shutter.
4. Hold the Fn button for 2 seconds. This should put the adapter into programming mode.
5. Set the lens to the corresponding aperture below to match the lens that is currently attached:
F5.6 43mm
F8 50mm
F11 65mm
F16 80mm
F22 150mm
F32 210mm
For example, if you want to set your lens' EXIF data to report 80mm, you would set the lens to f/16.
6. Press the shutter button to take a picture.
7. Turn off the camera.
8. After turning the camera back on, the camera should report the EXIF data of the lens you've set.
